Gluten-Free Bread: How to Fix 5 Common Mistakes
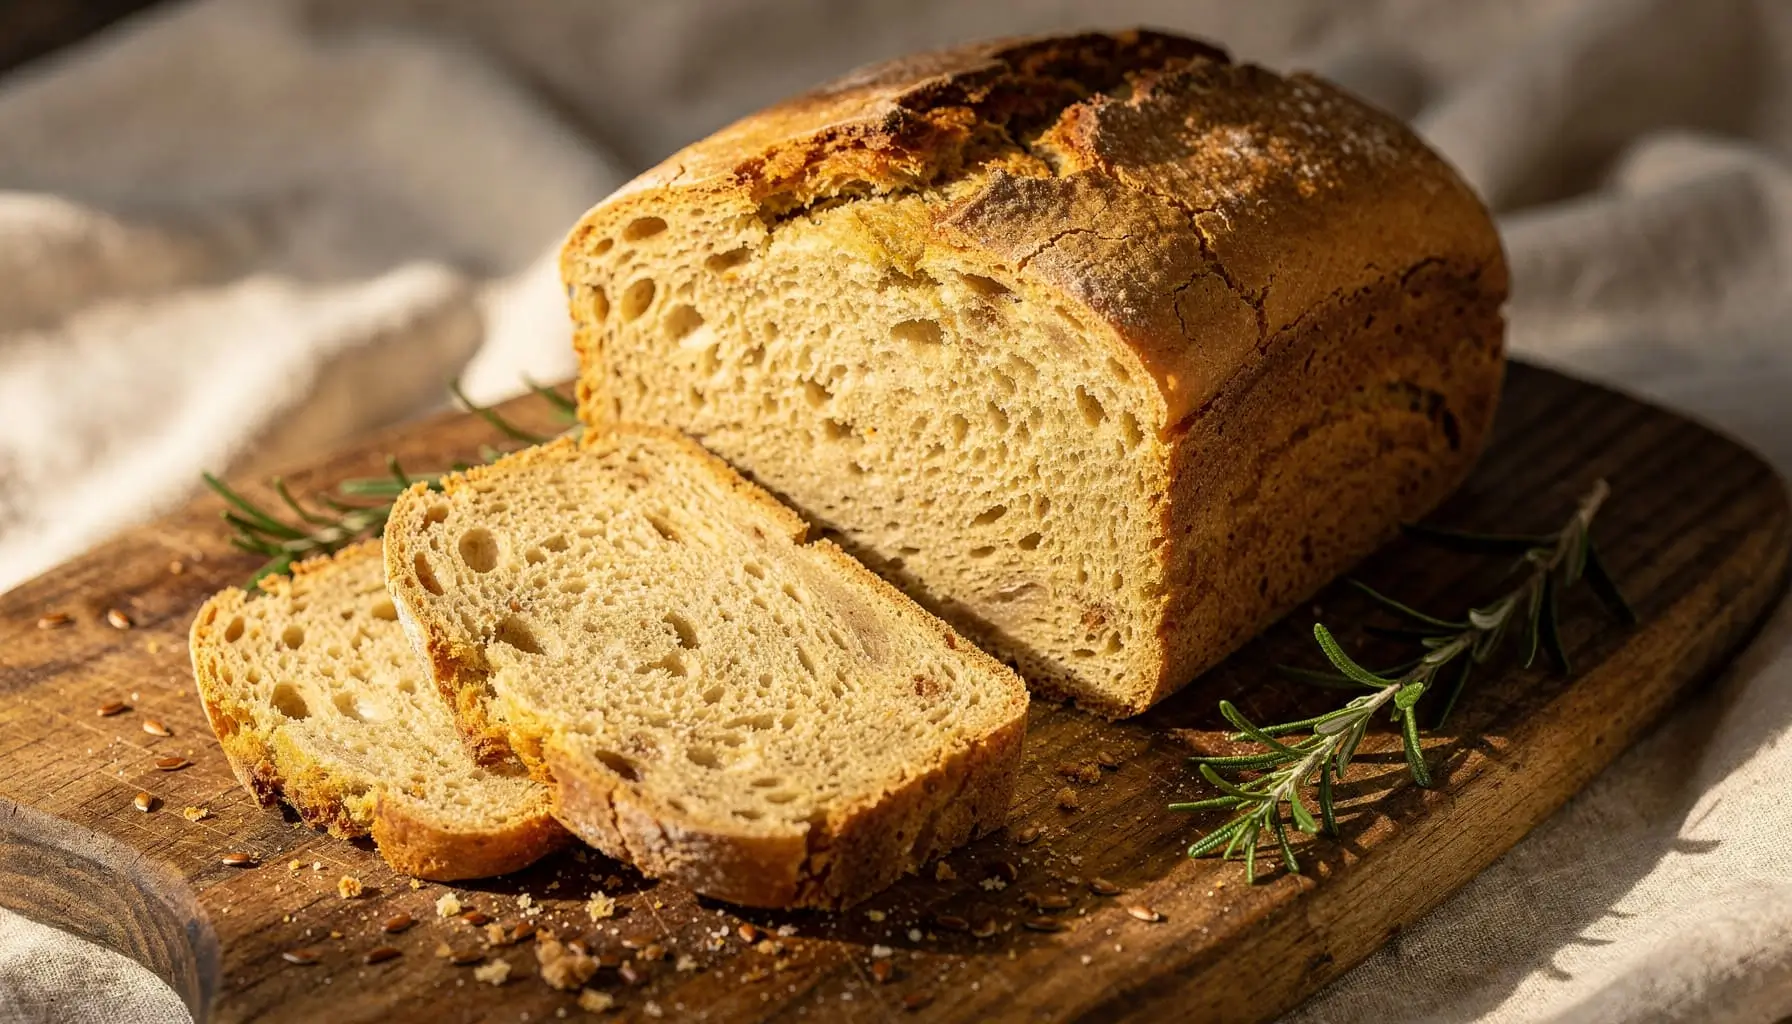
Gluten-Free Bread
Blood-Sugar-Friendly • Diabetes-Safe • Soft & Fluffy
💡 Blood Sugar Tip: This recipe uses almond milk and ground flaxseed to add fiber and protein, which helps slow glucose absorption. Pair with avocado or eggs for even better blood sugar control.
Gluten-Free Bread: How to Fix 5 Common Mistakes
If you have ever pulled a loaf of gluten-free bread out of the oven only to find it dense, gummy, or completely fallen in the middle, you are not alone. Gluten-free bread behaves very differently from traditional wheat bread, and small errors in technique or ingredients can completely change your results.
The good news? Most of these problems are completely fixable once you know what to look for. In this guide, you will learn exactly how to identify and correct the 5 most common gluten-free bread mistakes — with a complete, blood-sugar-friendly recipe designed for people managing type 2 diabetes or gestational diabetes.
Author & Affiliate Disclosure
This post was written by the Balance Level team to support people managing blood sugar through real, approachable food. Some links may be affiliate links — we only recommend products we genuinely trust. This content is for informational purposes only and is not a substitute for professional medical advice. Always consult your healthcare provider before making dietary changes.
📋 Table of Contents
🛠️ Equipment Needed
Having the right tools makes a significant difference when baking gluten-free bread. Unlike wheat-based baking, gluten-free dough is more sensitive to measurement errors and temperature changes.
GF flours vary by weight vs. volume. A scale ensures precise measurements and accurate carb counting per serving.
Proper pan size controls rise and shape.
GF batter is wetter than wheat dough and mixes best mechanically.
Internal temp of 200–210°F (93–99°C) confirms doneness without guessing.
Large and medium bowls; spatula for scraping wet batter.
Prevents sticking and makes removal effortless.
📝 Ingredients
Yield: 1 standard loaf (approximately 12 slices)
| 🌾 Dry Ingredients | ||
|---|---|---|
| Ingredient | Amount | Notes |
| Gluten-free all-purpose flour blend | 2 cups (240g) | ~30g carbs per ¼ cup — verify with your blend |
| Xanthan gum | 1 tsp | Omit if your flour blend already contains it |
| Baking powder | 1 tbsp | Ensure it’s fresh for proper rise |
| Fine sea salt | 1 tsp | Enhances flavor |
| Ground flaxseed | 1 tbsp | Adds fiber, supports blood sugar balance ⭐ |
| 💧 Wet Ingredients | ||
|---|---|---|
| Ingredient | Amount | Notes |
| Large eggs (room temperature) | 3 | Room temp = better rise |
| Unsweetened almond milk | 1 cup (240ml) | ~1g carbs per cup — low-carb choice ⭐ |
| Olive oil or melted coconut oil | 3 tbsp | Healthy fat source |
| Apple cider vinegar | 1 tsp | Activates leavening; no glucose impact |
| Honey or maple syrup (optional) | 1 tbsp | ~5g carbs — aids browning |
⚠️ Important: Carb estimates are approximate. Always verify with your personal tracking app, as values vary by brand and specific flour blend used.
🔄 Substitution Suggestions
| Goal | Swap | Result |
|---|---|---|
| Lower Carb | Replace ½ cup GF flour with almond flour | Reduces carb load, adds healthy fat |
| Egg-Free / Vegan | 3 flax eggs (1 tbsp ground flax + 3 tbsp water per egg, rested 5 min) | Slightly denser but enjoyable |
| Dairy-Free | Almond milk (already dairy-free). Oat milk works but adds ~4g carbs/cup | Minimal flavor change |
| Budget-Friendly | Sunflower oil replaces olive oil | Minimal flavor change |
⏱️ Timing
15 min
Prep Time
30 min
Rise Time (yeast)
50–55 min
Cook Time
65–70 min
Total Time
👨🍳 Step-by-Step Instructions
Phase 1: Preparing the Batter
Preheat your oven to 375°F (190°C). Grease your 9×5 loaf pan and line with parchment paper. Cold batter going into a properly preheated oven helps achieve an even rise.
Whisk all dry ingredients together in a large bowl — GF flour blend, xanthan gum, baking powder, salt, and ground flaxseed. Mixing dry ingredients first prevents clumping and ensures even distribution of leavening agents.
In a separate bowl, whisk eggs, almond milk, oil, apple cider vinegar, and honey until fully combined. Room-temperature eggs incorporate better and help the batter rise more evenly.
💡 Blood Sugar Tip: The vinegar activates leavening and does not affect glucose levels.
Phase 2: Mixing and Resting
Pour wet ingredients into dry ingredients. Mix with a hand mixer or stand mixer on medium speed for 2 minutes. The batter will be thicker than pancake batter but not as firm as wheat dough — this is completely normal.
Let the batter rest for 10 minutes before pouring into the pan. This allows the flaxseed and xanthan gum to hydrate fully, which improves texture and structure.
🚫 Don’t Skip This! Skipping the rest is one of the most common mistakes that leads to a gummy center.
Phase 3: Baking
Pour the batter into your prepared loaf pan and smooth the top with a wet spatula. A smooth, even top promotes uniform baking.
Bake for 50–55 minutes. Do not open the oven door during the first 40 minutes — sudden temperature drops cause gluten-free bread to collapse in the center.
Check doneness with an instant-read thermometer. The internal temperature should read 200–210°F (93–99°C). If the top is browning too quickly, tent loosely with foil after 35 minutes.
Cool completely before slicing — at least 60 minutes. This is non-negotiable for gluten-free bread. Cutting too early releases steam trapped inside and creates that dense, gummy texture most people blame on the recipe. This single step fixes Mistake #1 automatically.
🩺 Blood Sugar Impact Summary
Gluten-free bread made with a high-quality GF flour blend, flaxseed, and almond milk offers a more manageable glycemic response compared to standard white bread. The added fiber from ground flaxseed and the protein from eggs help slow glucose absorption, making this a more blood-sugar-friendly option for people with type 2 diabetes or gestational diabetes.
⚠️ Portion Control Matters: Even lower-glycemic breads can raise blood sugar when eaten in large quantities. Stick to one or two slices per sitting and pair with a protein or healthy fat source (avocado, eggs, nut butter) for optimal glucose management.
📚 Related: Explore our beginner’s guide to low-glycemic eating and our blood-sugar-friendly meal planning guide for busy weekdays.
📊 Nutritional Information
Per serving: 1 slice (based on 12 slices per loaf). Estimates based on standard USDA values.
| Nutrient | Per Slice |
|---|---|
| Calories | ~145 kcal |
| Total Carbohydrates | ~22g |
| Dietary Fiber | ~2g |
| Net Carbs | ~20g |
| Protein | ~4g |
| Total Fat | ~5g |
| Sodium | ~180mg |
⚠️ Nutritional estimates are approximate. Always verify with your own tracking app or consult your dietitian.
🔄 Healthier Alternatives & Their Impact
| Swap | Taste Effect | Blood Sugar Impact |
|---|---|---|
| ½ cup GF flour → almond flour | Slightly denser, nuttier | Lowers net carbs by ~4–5g/slice ⬇️ |
| Flax eggs instead of regular eggs | Slightly earthier, similar texture | Adds fiber, minimal glucose impact |
| Honey → sugar-free syrup | Very similar taste | Removes ~5g carbs per loaf ⬇️ |
| Add 2 tbsp psyllium husk | Chewier, more bread-like | Adds soluble fiber, blunts glucose spike |
| Almond milk → oat milk | Slightly sweeter | Adds ~3–4g carbs per loaf ⬆️ |
🍽️ Serving Suggestions
For Breakfast
Toast one slice and top with avocado, a soft-boiled egg, and chili flakes. The healthy fat and protein help slow glucose absorption.
For Lunch
Use two slices for an open-faced sandwich with turkey, mustard, and leafy greens — a balanced, blood-sugar-friendly midday meal.
For a Snack
Spread with natural almond butter (no added sugar) for a satisfying, lower-glycemic option.
💡 Pairing Tip: Always serve gluten-free bread alongside a non-starchy vegetable or protein source to balance the carbohydrate load, even with modest portions.
❌ 5 Common Mistakes to Avoid
Cutting the Bread While Warm
This is the single most common cause of gummy, dense slices. The internal structure of gluten-free bread continues setting as it cools. Always wait at least 60 minutes. This one step alone fixes the #1 complaint about GF bread.
Using Too Much Liquid
Gluten-free flour blends absorb liquid differently than wheat flour. Adding extra milk to “loosen” the batter almost always leads to a sunken, underbaked center. Follow measurements precisely using a digital scale — volume measurements are unreliable with GF flours.
Skipping or Doubling the Xanthan Gum
Xanthan gum replaces the binding structure that gluten provides. Too little = crumbly bread. Too much = unpleasantly gummy texture. Always check if your flour blend already contains it before adding more.
Opening the Oven Too Early
Gluten-free bread is highly sensitive to temperature changes during baking. Opening the oven before the 40-minute mark can cause immediate collapse. Trust the process and use the oven light to check visually if needed.
Skipping the Protein Pairing
Eating gluten-free bread alone — without protein or fat alongside it — can lead to a sharper glucose spike, especially for people managing type 2 diabetes or gestational diabetes. Always pair with eggs, avocado, nut butter, or lean protein.
📦 Storing & Reheating Tips
🌡️ Room Temperature
Store in an airtight container for up to 2 days. GF bread dries out faster than wheat bread — seal it well.
❄️ Refrigerator
Keeps well for up to 5 days in an airtight container. Note: refrigeration can slightly firm the texture.
🧊 Freezer
Slice before freezing and store in a freezer-safe bag for up to 3 months. Separate slices with parchment paper to prevent sticking.
🔥 Reheating
Toast directly from frozen for best texture. Avoid microwaving — it makes GF bread rubbery. Use a toaster or 350°F oven for 5–8 minutes.
✅ Conclusion
Baking great gluten-free bread is absolutely achievable once you understand the five key mistakes that trip most people up: cutting too soon, adding too much liquid, misusing xanthan gum, opening the oven early, and eating bread without a balanced pairing. With the right technique, proper tools, and this straightforward recipe, your next loaf can be soft, well-risen, and genuinely delicious.
Gluten-free bread does not have to be a compromise. When made thoughtfully, it can be a satisfying, blood-sugar-friendly part of your daily meals, especially for those managing type 2 diabetes or gestational diabetes. Small adjustments lead to big results.
Try this recipe and let me know how it turned out in the comments below. Don’t forget to subscribe for more blood-sugar-friendly recipes delivered directly to your inbox.
📥 Download the printable grocery list for this recipe to make your next shopping trip easier.
Download Grocery List❓ Frequently Asked Questions
Q1: Can I eat gluten-free bread if I have type 2 diabetes?
Yes, gluten-free bread can be part of a diabetes-friendly diet, but the carbohydrate content still matters. Choose versions made with almond flour or added fiber like flaxseed, and always pair bread with protein or healthy fat to slow glucose absorption. Portion control — typically one to two slices — is important.
Q2: Is gluten-free bread safe during gestational diabetes?
Gluten-free bread can be appropriate for gestational diabetes when made with lower-glycemic ingredients and eaten in controlled portions. Always consult your OB or registered dietitian for personalized guidance, as individual blood sugar responses vary during pregnancy.
Q3: Why does my gluten-free bread always come out gummy inside?
The most common cause is cutting the bread before it has fully cooled. Gluten-free bread needs at least 60 minutes of cooling time to set its internal structure. Excess liquid in the batter is the second most frequent culprit.
Q4: Can I make this gluten-free bread recipe without eggs?
Yes. Replace each egg with a flax egg: mix 1 tablespoon of ground flaxseed with 3 tablespoons of water and let it rest for 5 minutes until gel-like. The texture will be slightly denser but still enjoyable.
Q5: How many carbs are in one slice of this gluten-free bread?
Based on this recipe, each slice contains approximately 20g net carbs. Verify with your tracking app, as this varies depending on the specific flour blend used. Using almond flour as a partial substitute can reduce this noticeably.
Q6: Why did my gluten-free bread collapse in the middle?
A collapsed center usually results from too much liquid in the batter, opening the oven door too early, or underbaking. Use an instant-read thermometer to confirm the internal temperature reaches 200–210°F before removing the loaf.
Q7: What is the best gluten-free flour blend for bread?
Look for blends that contain a mix of rice flour, tapioca starch, and potato starch. Blends that already include xanthan gum are convenient. For lower blood sugar impact, blends that incorporate almond or chickpea flour offer more protein and fiber.
Q8: How do I know if my gluten-free bread is fully baked?
The most reliable method is an instant-read thermometer — the center should read 200–210°F (93–99°C). The top should be golden brown and the loaf should sound hollow when tapped on the bottom.
Disclaimer: The information provided on Balance Level is for general informational and educational purposes only. It is not intended to replace professional medical advice, diagnosis, or treatment. Always seek the guidance of your physician, registered dietitian, or qualified healthcare provider with any questions you may have regarding a medical condition or dietary changes.